Every year around Thanksgiving, Press Play revisits some of the interviews with chefs and cookbook authors over the past year. The aim is to inspire you to create new traditions with your family, or help you finalize your holiday menu.
Kenji Lopez-Alt, author of “The Wok: Recipes and Techniques,” made his name distilling the science of cooking into great kitchen hacks. He says the wok is an underappreciated pan that can be used to make all kinds of dishes.
“You can do everything from making stock in it, to obviously stir frying, it's the best tool for deep frying. It's the best tool for steaming. You can smoke in it,” Lopez-Alt says. “When you put food in it to deep fry … any sort of oil that splatters, it gets caught on the sides of the wok instead of going over and onto your stovetop. So there's less clean-up. You can also get a metal spider or strainer and maneuver stuff in there more easily, which is … what makes it easier to do things like poaching or simmering.”
Side dishes
When it comes to the average holiday spread, a lot of the main staples don’t pack the boldest flavors. Turkey, mashed potatoes, gravy, stuffing, squash — that’s a lot of beige.
For a dash of color, turn to Anna Voloshyna, author of “Budmo!: Recipes from a Ukrainian Kitchen.” If you want to try her spicy and sour tomatoes, start now because they need a few days to ferment.
Mom’s famous spicy and sour tomatoes
Serves 8
Makes one 2-quart jar
.jpg") “These might be the most delicious pickled tomatoes you will have ever tasted, it will be hard to wait the three days they need to sit before trying one,” Anna Voloshyna writes about her mom’s famous spicy and sour tomatoes. Courtesy of Anna Voloshyna.
“These might be the most delicious pickled tomatoes you will have ever tasted, it will be hard to wait the three days they need to sit before trying one,” Anna Voloshyna writes about her mom’s famous spicy and sour tomatoes. Courtesy of Anna Voloshyna.
These tomatoes are hands down the most popular zakuska I serve at my dinners. As you can guess from the name, these are another of my mom’s creations. They are very different from traditional pickled tomatoes, which typically call for a vinegary pickling liquid. My mom immerses her tomatoes in a thick, spicy sauce made from fresh herbs, chile, oil, and vinegar. This incredible mixture makes the tomatoes wonderfully refreshing, with a bright pop of acid and a flavor riot of herbs and garlic. I have to warn you, however, that because these might be the most delicious pickled tomatoes you will have ever tasted, it will be hard to wait the three days they need to sit before trying one. I have personally witnessed diners at my pop-ups drinking the leftover pickling liquid once the tomatoes have been wiped out.
Ingredients
- 2 pounds small red tomatoes (such as Campari or Pearl), halved lengthwise
- 1 large green bell pepper, seeded and roughly chopped
- 1 medium-size fresh jalapeño chile
- 4 garlic cloves
- 1 cup chopped mixed fresh herbs (such as dill, flat-leaf parsley, and cilantro)
- 1/3 cup sunflower or grapeseed oil
- 1/3 cup distilled white vinegar
- 2 tablespoons sugar
- 1 teaspoon salt
Instructions
- Pack the tomato halves into a clean, widemouthed 2-quart glass jar with a tight-fitting lid.
- To make the pickling marinade, in a food processor, combine the bell pepper, chile, garlic, herbs, oil, vinegar, sugar, and salt and pulse until a thick, slightly chunky mixture forms, about 30 seconds. Pour the marinade over the tomatoes and screw the lid on the jar.
- Refrigerate for at least 3 days before serving. The tomatoes will keep in the refrigerator for up to 1 month. Over time, they will develop even brighter acidity and more complex flavor of slightly fermented tomatoes.
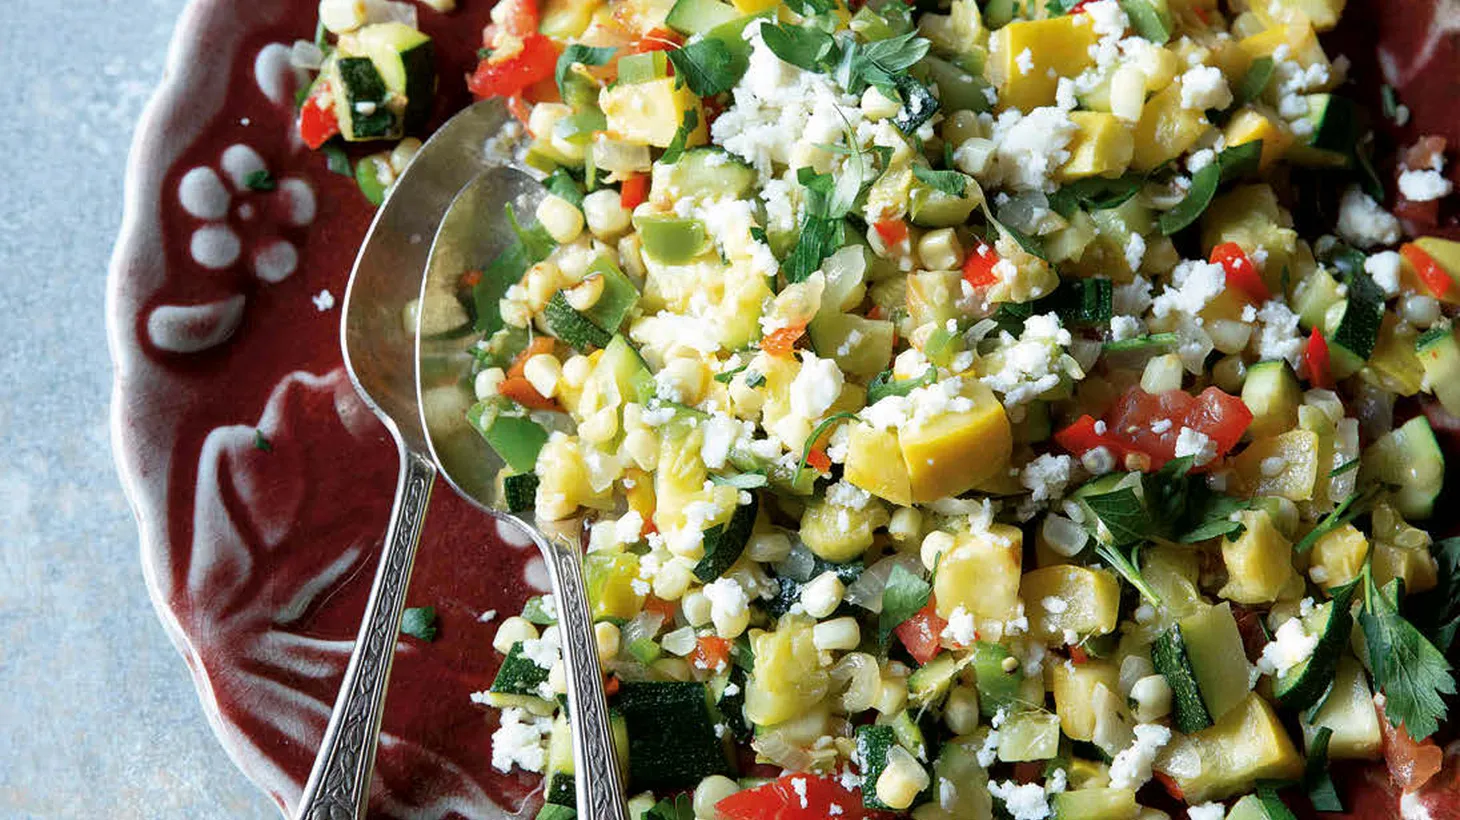
Navajo chef Freddie Bitsoie, author of “New Native Kitchen,” has a recipe for Calabasas squash, tomatoes and queso fresco. It’s named for what is now Calabasas, California, which was home to the Chumash. Bitsoie says this dish reflects the kinds of crops they grew — and what we still grow in Southern California.
Calabasas squash, tomatoes and queso fresco
Serves 6 to 8
For the Indigenous people of the Western Hemisphere, squash has always been an important food source. It’s believed to be the oldest cultivated food in North America, but that’s just one of the reasons I give it so much attention in these recipes. Besides its historical significance, squash is versatile and delicious. This dish is named for what’s now Calabasas, California, originally home to the Chumash. They lived among the hills and canyons, relying on wildlife for sustenance as well as the fruits and vegetables that grew easily in the region’s rich soil. This dish reflects the foods native to that area, and my recipe can work with any summer squash. I especially like pattypan, which is denser and crunchier than other summer varieties.
Yellow squash works well, and so does common green zucchini — though I prefer golden zucchini for its more delicate, sweeter taste. Keep this recipe handy in late summer and early autumn when summer squash is plentiful, tomatoes are at their peak, and bell peppers and chilies are just-picked — you’ll taste the entire season in every bite.
Ingredients
- 2 tablespoons canola oil
- ¼ cup (35 g) diced yellow onion
- 1 cup (145 g) fresh corn kernels
- ½ cup (75 g) chopped green chilies
- 1 cup (150 g) chopped green bell pepper
- 1 pound (455 g) thinly sliced summer squash
- 1 vine-ripe tomato, diced
- Salt and freshly cracked black pepper
- ¼ cup (30 g) crumbled queso fresco
- ¼ cup (13 g) chopped fresh flat-leaf parsley
Instructions
- In a large sauté pan over medium-low heat, add the oil.
- When the oil is hot, add the onion and sauté just until the onion begins to soften.
- Add the corn, green chilies, and bell pepper and sauté for 5 minutes.
- Next, add the squash and tomato and sauté for another 5 minutes.
- Season with salt and pepper and stir.
- Cover the pan with a lid and cook until the squash is tender, about 10 minutes.
- Sprinkle with the queso fresco and parsley just before serving.
Main dish: Tacos
Is there a more effective vessel to achieve the perfect Thanksgiving bite than a tortilla? A little bit of turkey, stuffing, a dollop of cranberry sauce, and a splash of gravy — all folded together in a soft yet sturdy tortilla?
Jorge Gaviria, author of “Masa: Techniques, Recipes, and Reflections on a Timeless Staple,” says it’s easy to hand-make tortillas, especially if you’re using masa harina.
Table Tortilla Masa (2.2 lb)(998 g)
Makes about thirty-five 5-inch (15 cm) tortillas
**Note: I like to pre-roll all of my masa into balls, so that the pressing and cooking processes that follow are streamlined. You may also save the pressed tortillas for later use. Some prefer to layer uncooked tortillas with wax paper in between and store in the refrigerator with a damp towel to cover. In our experience, rather than storing uncooked tortillas, we find it easier to par-cook the tortillas straight away and reheat later, adding a bit of water if necessary. Uncooked tortillas are not only more perishable, they are also more difficult to hydrate without mixing the masa all over again—and re-mixing would be a bummer if you’ve already taken the time to portion and shape each tortilla.
Instructions
- PRESSING THE TABLE TORTILLA: Preheat a comal to medium-low heat. Open the tortilla press. Lay a plastic liner squarely on the surface of the press.
- Break off about 2 Tbsp of fresh masa (or whichever size you prefer) and roll the masa into a ping-pong-size ball (1½ in [4 cm]) with your hands (see Note). Place the masa ball in the center of the plastic liner; to end up with a centered tortilla in the press, it sometimes helps to place the masa ball about 1 in [2.5 cm] from the center, closer to the press’s hinge/pivot point. Place a second plastic liner on top of the masa ball.
- With the top half of your fingers, slightly flatten the masa until it begins to adhere to the plastic liners (this prevents the masa from shifting around when you close the press).
- Close the tortilla press lid and apply pressure by pushing down on the lever. Open the tortilla press lid and remove the flattened masa/uncooked tortilla. (You may first choose to flip the tortilla and press a bit more, if the tortilla is not as thin as you’d like. I like them to be about 1/16 in [1.5 mm].)
- For a decorative flourish, you can press flat herbs and flowers into the face of the tortilla at this stage. After the initial pressing, open the tortilla press lid, remove the top plastic liner, and place your herbs or flowers (for example, cilantro flower, hoja santa, tarragon) across the face of the tortilla (see photo above). Place the top plastic liner across the face of the tortilla (sealing in the herbs and/or flowers), close, and lightly press. Your garnish should now be nicely pressed into the tortilla.
- For broad, large leaves, like hoja santa, for example, you may choose to apply a circle pastry cutter once the tortilla has been pressed and separated from the plastic liners to yield a more uniform finished shape.
- Carefully peel away one plastic liner at a time. It helps to hold the tortilla face up (flat in your hand) and first carefully peel off the top liner; then, pinching one of the outer edges/corners of the plastic, flip the uncooked tortilla over to your opposing hand (the tortilla should now be directly touching your open-faced, opposing hand, ideally your pinky through middle fingers for best stability) and peel off the second plastic liner off.
- COOKING THE TABLE TORTILLA: Raise the temperature of your preheated comal to medium heat. In a smooth, backhanded sweeping motion, place the uncooked tortilla directly on the nonstick surface. I prefer to put it directly onto the clean, dry surface; however, you can oil it if you prefer. Sear the first side for 20 to 30 seconds. I recommend using a timer, especially as you get a feel for your pan and the overall process. The hotter the temperature, the less time will be needed per side (even as little as 15 seconds, depending on how high the temperature is). The sear should yield a surface with even, light-colored spotting throughout. Flip and sear on the second side for another 20 to 30 seconds. Finally, flip the tortilla to its original seared side, allowing it to continue cooking through the center to your desired consistency and doneness. Play with sear times as you see fit.
- THE CRUMPLE TEST: One classic test for pliability is to crumple a tortilla in your fist, like a piece of paper, and then release it back onto a flat surface. You’ve reached table tortilla perfection if your tortilla unfurls with no cracking or breakage.
- Be sure to wipe your comal clean and dry after each use to prevent buildup (I almost always get a bit of masa somewhere on the surface somehow) or corroding.
- If you intend to enjoy the tortilla immediately—as a snack, perhaps with a little salt and/or piece of avocado in the center—continue cooking for a bit longer. Once it’s puffed for about 10 seconds, move the tortilla to the outside edge of your comal (if space allows) where it is slightly cooler, to let the tortilla continue cooking through the center for an additional 5 to 10 seconds per side. Transfer to a kitchen towel or tortilla warmer (tortillero) and allow the cooked stack of tortillas to steam for 5 minutes before serving. This will help prevent the tortillas from cracking.
- If you plan to reheat the tortilla at some point later on—preferably within a couple of hours—it’s best to remove the tortilla from the heat source once both sides have been seared and cooked through for a combined additional 15 seconds. By this point in the cooking process, it will be about 80 to 90 percent cooked. This will help ensure that you do not overcook the tortilla during the reheating process later on. Store in a kitchen towel or tortilla warmer if using within a few hours.
- If you plan to refrigerate or freeze the tortillas for later use, cool the tortillas by fanning (that is, unstacking) them over a sheet pan (ideally with a cooling rack, to allow for ventilation). Once cooled to room temperature, place in a resealable plastic storage bag in the refrigerator for up to 7 days or in the freezer for up to 1 year.
- TO REHEAT THE TORTILLAS: While I prefer reheating tortillas on a comal, there is no shame in reheating them in the microwave. Believe it or not, I’ve seen at least one ultra fine–dining restaurant group do just this. Some moisture loss will have occurred between the time the tortilla was first removed from the pan until now (whether stored ambient, refrigerated, or frozen), whether through steam or gradual evaporation. As the tortilla continues to cool, its gelatinized starch will begin to thicken and harden in texture. This process is known as retrogradation of starch. This can and will result in brittleness and/or cracking. We’ll therefore want to incorporate a bit of moisture into the reheating process.
- To reheat and/or revive a tortilla using a comal, first preheat the comal to medium-high heat. (Note: If beginning with a frozen tortilla, you may certainly put it directly onto the comal without wetting; however, I find it best to thaw it first and then proceed.) With an atomizer (on mist setting) or wet hands, lightly wet each side of the tortilla. Place the tortilla on the heated comal and heat for 20 to 30 seconds per side. Combined, the reintroduction of moisture and heat should render the tortilla pliable again. Transfer to a tortilla warmer and enjoy immediately.
- To reheat in a microwave, wrap a tortilla inside of a kitchen towel (so that both sides of the tortilla are covered) and heat for 30 seconds.
- Whether it be over a grill or in the microwave, you may choose to cook your tortilla on a range of cooking surfaces, not just a comal. Just keep in mind that the cook times will vary for each medium.
Reprinted from Masa by Jorge Gaviria with permission from Chronicle Books, 2022. Photographs © Graydon Herriott.
Dessert
One of Good Food host Evan Kleiman’s favorite favorite holiday recipes is chocolate gingerbread, particularly from Nigella Lawson’s book “Feast.” Kleiman says it hits all the right seasonal notes — with warming spices like ginger, cinnamon, nutmeg, and a little chocolate to balance out the sweetness.
Nigella’s Chocolate Gingerbread from “Feast”

Chocolate gingerbread (left) is served with lemon curd (right.) Photo by Evan Kleiman/KCRW
Ingredients
- 1 ½ sticks unsalted butter
- 1 cup plus 2 tablespoons dark brown sugar
- 2 tablespoons superfine sugar
- ¾ cup golden syrup or light or dark corn syrup
- 3/4 cup black treacle or molasses
- 1/4 teaspoon ground cloves
- 1 teaspoon ground cinnamon
- 2 teaspoons ground ginger
- ½ - 1 teaspoon freshly ground black pepper, optional (Evan’s addition)
- 1 ¼ teaspoons baking soda
- 2 tablespoons warm water
- 2 eggs
- 1 cup milk
- 2 cups all-purpose flour
- 1/3 cup unsweetened cocoa
- 6oz package or 1 cup semisweet chocolate chips
Instructions
- Preheat the oven to 325F.
- Tear off a big piece of parchment paper to line the bottom and sides of a roasting pan of approximately 12 x 8 x 2 inches deep.
- In a decent-sized saucepan, melt the butter along with the sugars, golden syrup, treacle or molasses, cloves, cinnamon, ground ginger and pepper if using.
- In a cup dissolve the baking soda in the water.
- Take the saucepan off the heat and beat in the eggs, milk and soda in its water.
- Sift the flour and cocoa into the wet mixture and beat with a wooden spoon to mix.
- Fold in the chocolate chips, pour into the lined pan and bake for about 45 minutes until risen and firm. It will be slightly damp underneath the set top and that's the way you want it.
- Serve with whipped cream and/or lemon curd. It’s pretty great with ice cream too.